How To Use eSIM in Windows 10?
Windows 10 now supports eSIM technology, transforming how we connect. Imagine switching carriers or activating data plans directly from your device settings, no physical SIM is required. It’s all about simplicity and flexibility, enabling instant connectivity wherever you are.
With eSIM on Windows 10, you can easily manage your mobile data needs without the hassle of swapping SIM cards. Whether you’re traveling or need reliable connectivity across different networks, eSIM simplifies the process, putting control at your fingertips.
Explore how eSIM on Windows 10 enhances your mobile experience by using eSim on your Windows 10.
Table of Contents
Requirements for Using eSIM on Windows 10
To utilize eSIM technology on Windows 10, ensure your device meets the following requirements:
1. Device Compatibility: Your Windows 10 device must have built-in eSIM hardware support. This feature is commonly found in modern laptops, tablets, and convertibles designed for cellular connectivity.
2. Operating System: Windows 10 version 1809 (October 2018 Update) or later is recommended for optimal eSIM functionality.
3. Internet Connection: An active internet connection is necessary to download and activate eSIM profiles.
4. Carrier Support: Verify that your mobile carrier offers eSIM plans and supports activation on Windows 10 devices in your region.
5. Activation Process: Follow the device-specific instructions provided by your manufacturer to activate an eSIM profile. This typically involves scanning a QR code or entering an activation code provided by your carrier.
Adding eSIM Profiles on Windows 10

Adding an eSIM profile on Windows 10 is straightforward and allows you to manage your mobile connectivity easily. Here’s how you can do it:
1. Open Network & Internet
Click on the Start > Settings > Network & Internet.
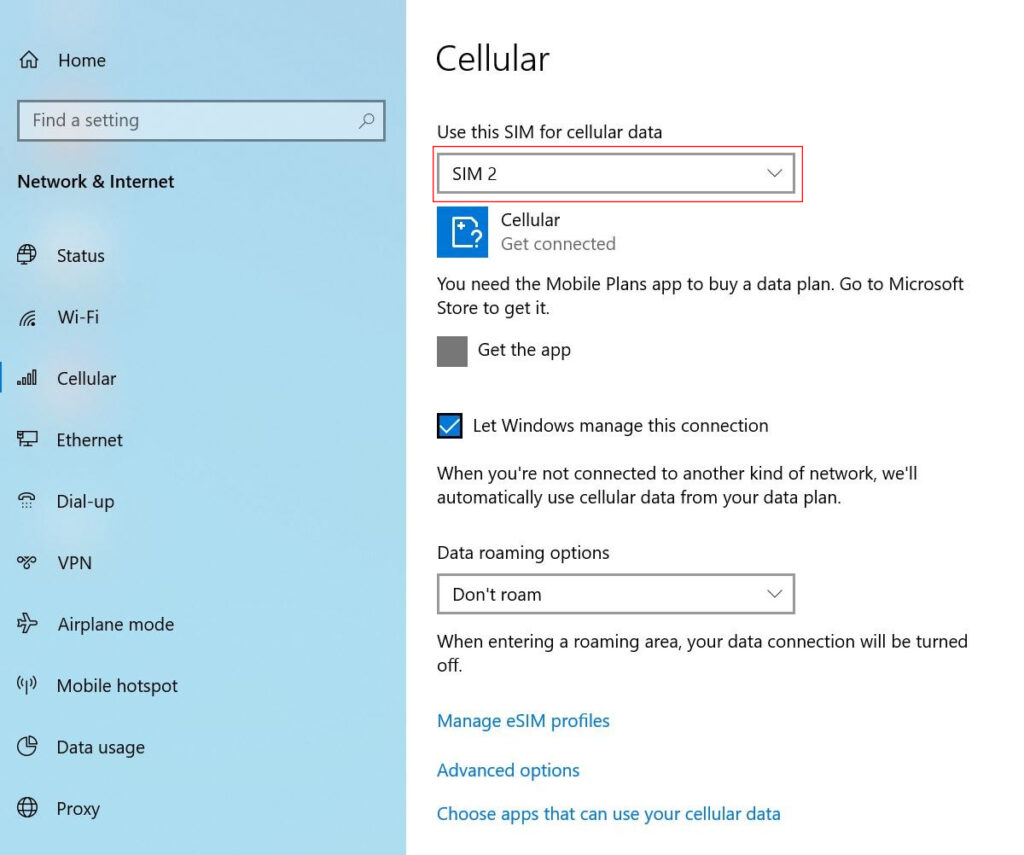
2. Select Cellular
On the left sidebar, select Cellular.
3. Manage eSIM Profiles

Under Cellular, Data, and SIM settings, look for an option to Add an eSIM profile or similar wording. Click on it to proceed. Depending on your device and carrier, you may need to scan a QR code provided by your carrier or enter an activation code. Follow the on-screen instructions provided by your carrier to complete the setup.
Once you have scanned the QR code or entered the activation code, your eSIM profile should be added successfully.
Connecting to Cellular Data Using an eSIM Profile on Windows 10
Once you have added an eSIM profile to your Windows 10 device, connecting to cellular data is quick and straightforward. Here’s how you can do it:
1. Access Navigate to Network & Internet
Click on the Start menu, then select Settings > Network & Internet.
2. Select Cellular Profile
On the left sidebar, select Cellular. Under the Cellular, Data, and SIM settings, you should see the eSIM profile you added listed. Click on it to select it.
3. Turn on Cellular Data
Toggle the switch to turn on Cellular data. You may have additional settings such as Roaming options, Data usage details, or APN settings depending on your carrier and eSIM profile configuration. Adjust these settings as needed.
Once cellular data is turned on and configured, your device will connect to the internet using the eSIM profile you selected.
Managing eSIM Profiles on Windows 10
Managing eSIM profiles on Windows 10 allows you to switch between different mobile plans or remove profiles as needed. Here’s how you can do it:
Switching Between Profiles
Go to Start > Settings > Network & Internet. On the left sidebar, select Cellular.
Under Cellular, Data, and SIM settings, you should see the eSIM profiles you have added listed. Click on the profile you want to switch to.
Once selected, the profile will be activated, and your device will use the data plan associated with that profile.
Deleting eSIM Profiles
Open Settings and navigate to Network & Internet > Cellular.
Under Cellular, Data, and SIM settings, click on the eSIM profile you want to remove.

Look for an option to Remove or Delete the profile. Click on it and confirm the action when prompted. The eSIM profile will be removed from your device.
Activation and Removal: Ensure you have an active internet connection when switching or deleting eSIM profiles.
Multiple Profiles: Windows 10 allows you to store multiple eSIM profiles, providing flexibility in managing different mobile plans.
Carrier Support: Availability of eSIM profiles and specific features may vary depending on your carrier and device compatibility.
By managing eSIM profiles on Windows 10, you can easily tailor your mobile connectivity to suit your needs, whether for travel, work, or personal use, enhancing the flexibility and convenience of your digital experience. And that is all about using eSIM on Windows 10.