
Create Kali Linux Bootable/Live USB on Windows
Want to use Kali Linux? Here you will create a bootable USB of Kali Linux then use the same USB to create Kali Linux Live on a USB. If you want to perform the only installation on any system then you can use the bootable USB of Kali Linux, for the purpose.
If you have second thoughts, then you can create Kali Linux Live USB and check the Linux out. Having a Live USB of Kali Linux can give you advantages of:
- Portable Kali Linux as can it be used anywhere on any system.
- No installation or booting, insert your USB and enjoy.
- Takes no storage or RAM of your system.
- No security issues.
- Can be also used for ethical hacking.
Table of Contents
Prerequisites for Kali Linux Live USB
If you want to create a Kali Linux Live or bootable USB, then you will need the following:
Download Kali Linux ISO File- which will be used for both burning and creating Live.
USB Pen Drive- it should be at least 16 GB in size. Even though the setup size of Kali Linux is only 3-4 GB and for creating a bootable USB required only 6 GB. However, to make it Live, you will need at least 16 GB.
Related Topic: How to Install Kali Linux on Your Computer?
How to Create Kali Linux Bootable USB on Windows

You can create a bootable USB by using third-party tools as:
- Etcher
- Rufus
- UUI (Universal USB Installer)
1- Burn with Etcher
First, you will insert your USB pen drive into your system. then you will download and run the Etcher app. You can use this link to download Etcher.
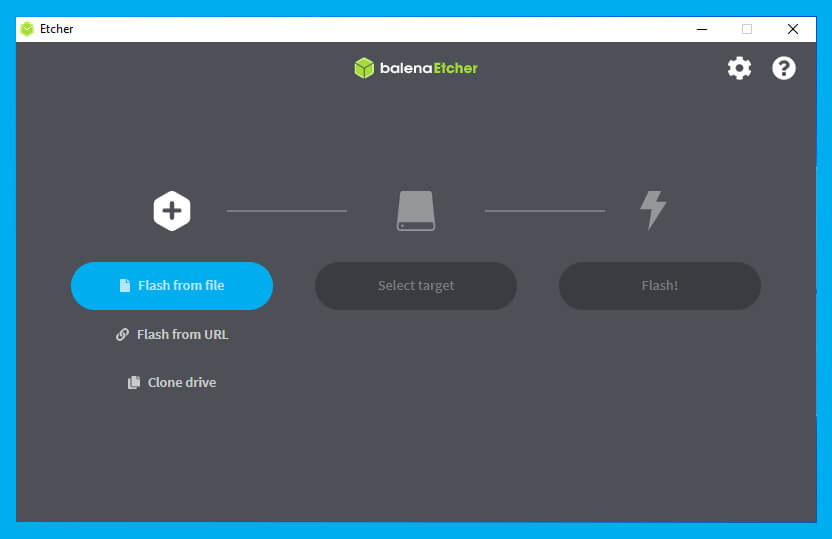
Now, run the app and the first thing you will see is the Flash from File option on your screen. Click on it and select the downloaded Kali Linux ISO Image File.
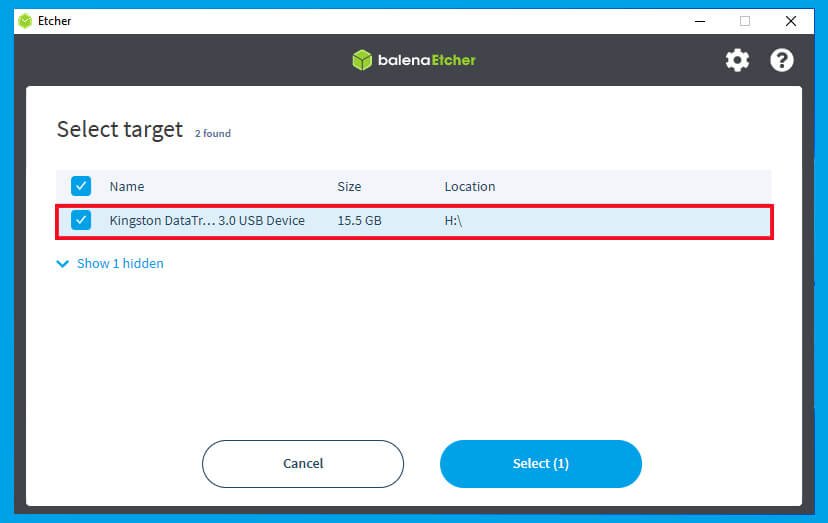
Then you will need to select the USB drive where you want to burn the ISO file. You will need to click on the Select Target option and a checklist will appear. Select the USB drive and click on Select.
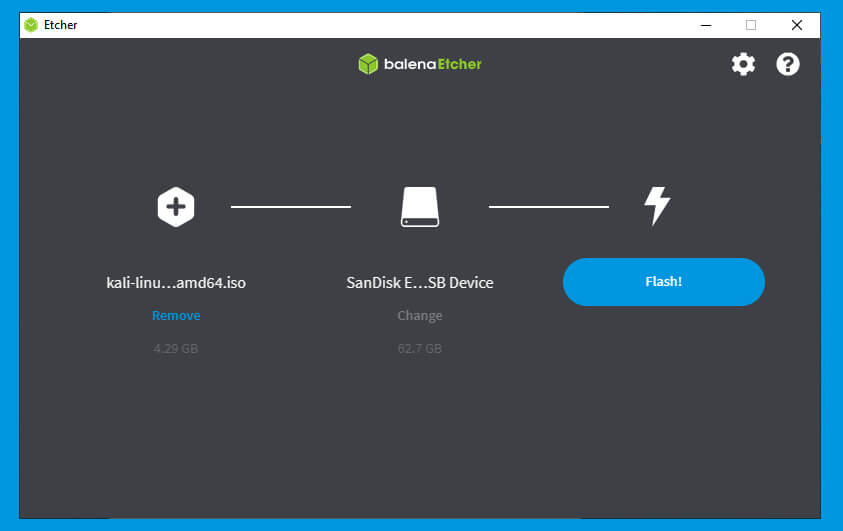
Here you will click on Flash! to burn the ISO file.
Clicking on Flash! will open a UAC prompt. It will ask you for admin privileges, provide and the burning will start. the procedure might take a while, once completed then you can remove your USB and can use that USB to install Kali Linux on any system.
Note: while Etcher uses MBR (Master Boot Record) for booting from BIOS that has UEFI compatibility support module (CSM). For those who have a system with GPT, using Etcher is quite a complicated process.
2- Bootable USB with Rufus
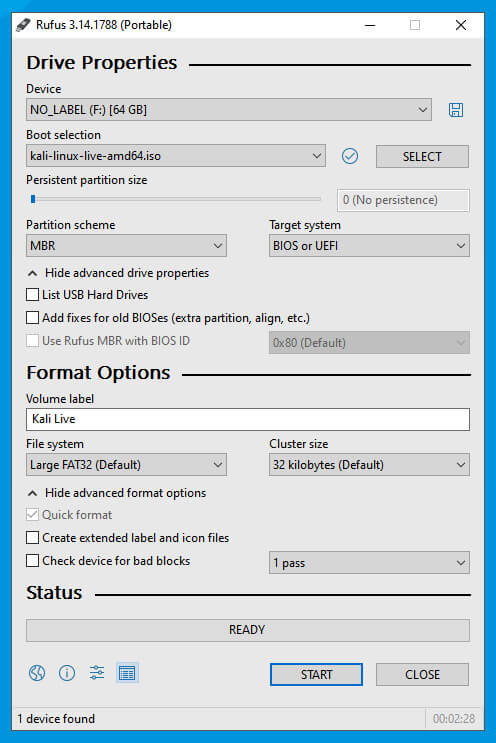
Download Rufus setup from the direct links here. Since there is no installation of Rufus, double click on the setup file and the app starts. Connect your USB drive and you will find your USB on the first option of Rufus.
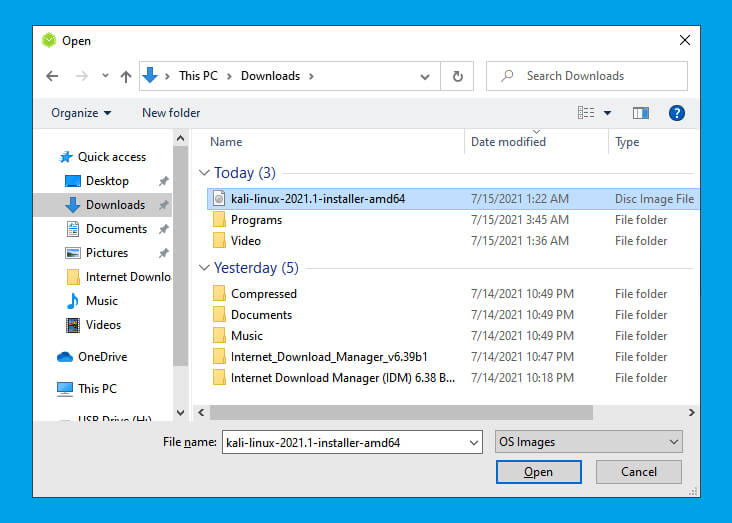
Select the USB, then ISO Image of Kali Linux, and then Boot Selection. Select the Partition Scheme (according to your system) and Target system too.
Once all the options are selected, name the USB and click on Start to run the operation. Likewise, the process will take some time.
Remember
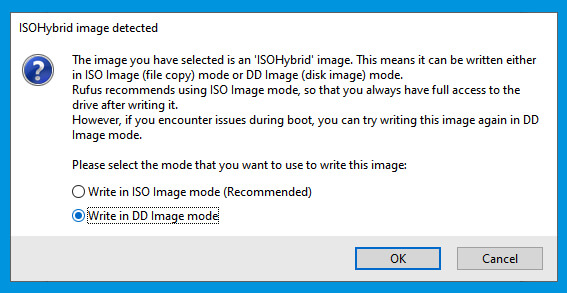
A prompt will appear on your screen with “ISOHybrid image detected”. You will see Please select the mode that you want to use to write this image:
- Write in ISO Image mode (Recommended)
- Write in DD Image mode
These are different options to burn Kali Linux ISO Image on your USB.
Here the first option (Write in ISO Image mode) does the edition of ISO Image. However; this method has potential loss of hardware compatibly. Since the USB might not compatible with this method we will select the other options.
The second option (Write in DD Image mode) create a new partition on your USB. Go to Start > Run (Windows+R) and type diskmgmt.msc and press Enter. navigate and find the USB drive, click on the unallocated space of your storage and create a new partition.
3- With UUI Universal USB Installer
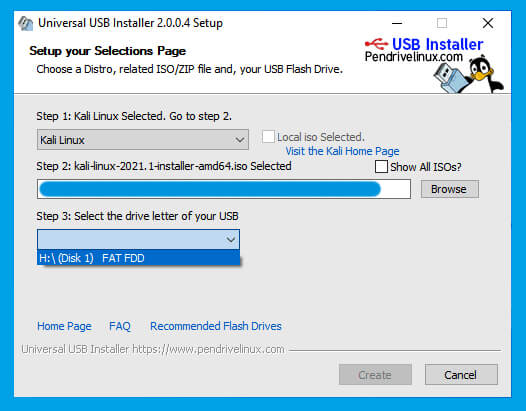
Using UUI is another method for Kali Linux bootable USB. Download and run UUI from this direct link.
First, select the Kali Linux version in the options. Then select the ISO file of Kali, by clicking on the Browse button. Then you will need to select the USB drive where you want to burn the ISO image and click on Create.
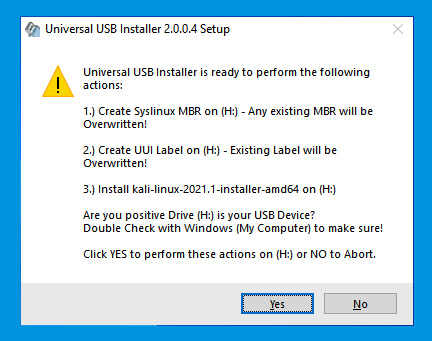
Like other third-party tools, a prompt will appear. Click on Yes and close the application, when the operation got completed.
Make Kali Linux Live
Like we mentioned in Rufus, a prompt will appear, “ISOHybrid image detected”. Select the second option will create a new partition that can be used for keeping the changes in your Kali Linux. However, if you have selected the first option then you can use the app as MiniTool Partition Wizard.
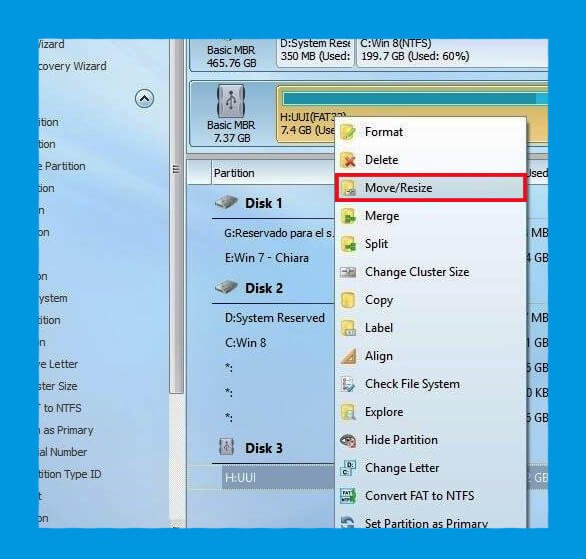
Here is the direct link to download and install MiniTool Partition Wizard. Once installed, you will select the USB drive where you have burned your Kali Linux (the methods above). Right-click on it and select Move/Resize options.
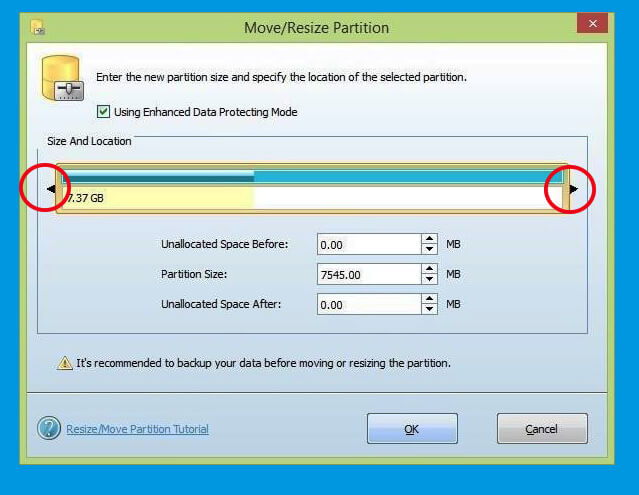
Then you will shrink it by using the arrow key. Since users have encountered resizing issues by typing manual the storage size, we would recommend you to avoid it.
Use the arrow keys, and shrink the USB size and click on OK.
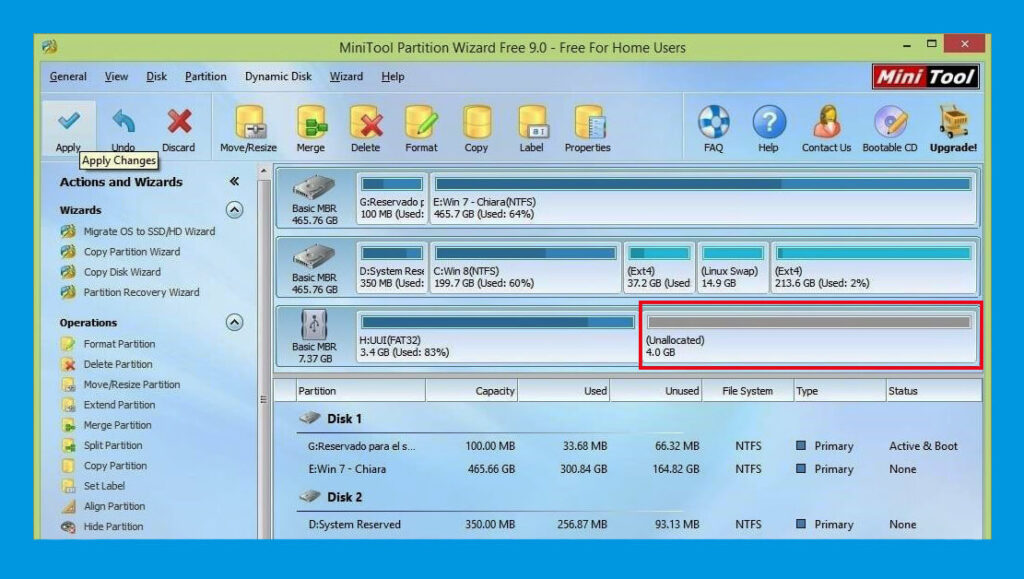
Here you have a portion of unallocated storage in your USB. Click on the unallocated storage and create a new drive. Select the following properties:
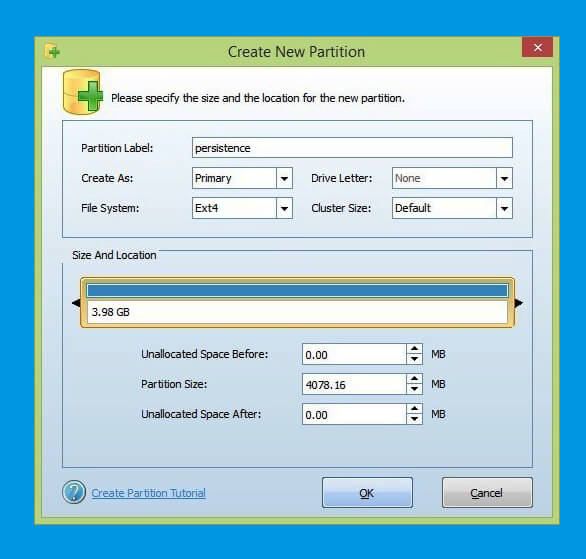
Create as: Primary
File System: Ext4
Partition Label: persistence
Once all the properties are selected, click on OK.
Configure Persistence of Kali Linux Live USB
Now you will reboot your system while your USB drive is connected. Your system should boot the USB drive that will be like Live USB Persistence.
Note: To make your system Boot USB, you enter your BIOS by pressing F12 (may vary on other systems) while your system starts. Will navigate to Boot section and will make the USB at top. Save changes and exit the BIOS.
When the system boots the USB, you will open the Terminal inside. Inside the Terminal, you will use the command:
fdisk –1it will show the part of the drive that you will need to see. Then use these commands:
dev/sdb3, dev/sdXY,mkfs.ext3 -L persistence /dev/sdXYthese will recreate the partition created in Windows on Ext3.
e2label /dev/sdXY persistencethe command above will give the name “Persistence” to your disk.
mkdir -p /mnt/my_usbmount /dev/sdXY/mnt/my_usbecho "/union"> /mnt/my_usb/persistence.conf=Here you are selecting, then creating a new section. Then you will create a configuration file where you will place all your temporary data. At last use, the command below to unmount the USB and reboot your system.
umount/dev/sdXY&&rebootboot again your Kali Linux Live USB and create a folder or file. Restart again, and check there will be your file. Congratulation, you have successfully created a Kali Linux Live USB.

Pingback: Download Kali Linux ISO File by Direct Links - ITechScreen