
How to Install NET Framework on Windows 11?
If you want to install NET Framework on Windows 11 then this is the place for you. Here we will install NET Framework 3.5 on our Windows 11. We can’t install NET Framework 4.8 as the application is available as pre-built on Windows 11. You can find the NET Framework 4.8 on your Windows 11 as NET Framework 4.x.
Related Topic: Install Net Framework 3.5 on Windows Server 2016
Table of Contents
Download .NET Framework 3.5 for Windows 11
Since there is a requirement specific NET Framework to run different applications. You will need versions below 4.8 for this purpose. To ease the work, you can use NET Framework 3.5 that can support from 2.0 to 3.5. Use the direct link below to download .NET Framework 3.5 for your Windows 11.
How to install NET Framework on Windows 11?
Once the setup is downloaded then you will double click on the setup file to run it.
Install NET Framework on Windows 11
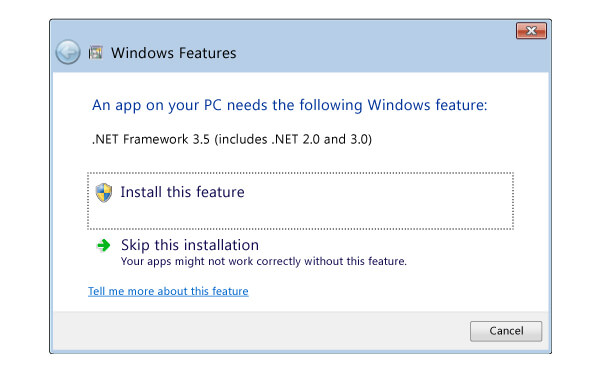
In previous versions of Windows OS such as Windows 10 or Windows 8.1; you will experience an Experience configuration dialog on your screen. There you were required to select the Install this feature option to perform the installation of NET Framework.
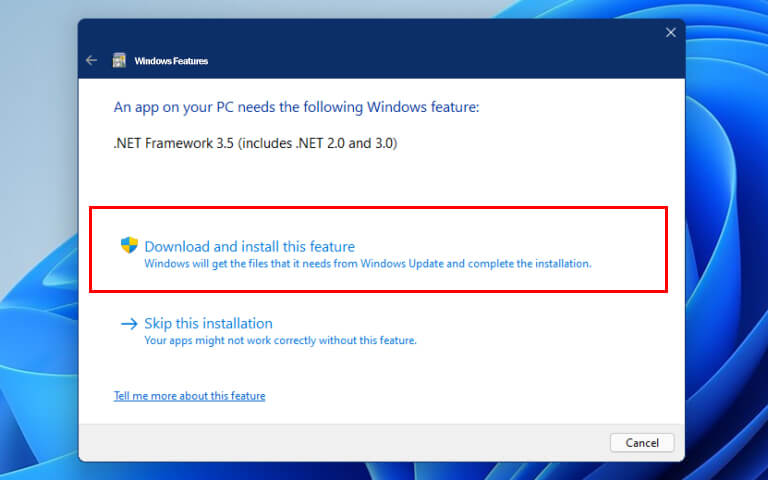
However; in Windows 11 you will find a prompt where you will need to select the Download and install feature option.
Note: there is the requirement of an internet connection to perform the operation given above.
Why are you experiencing the prompt?
The prompt is created by Microsoft as an environment for running target and specific versions of NET Framework on Windows OS.
Enable NET Framework on Windows 11
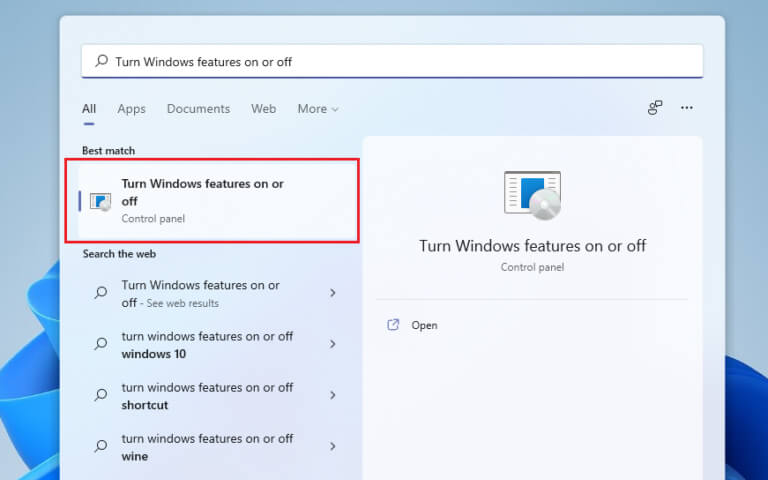
All of the Windows 11 users have NET Framework on their system and need to enable it only. Start the procedure by going to Start > Windows Features. There you will find Turn Windows features ON or OFF.
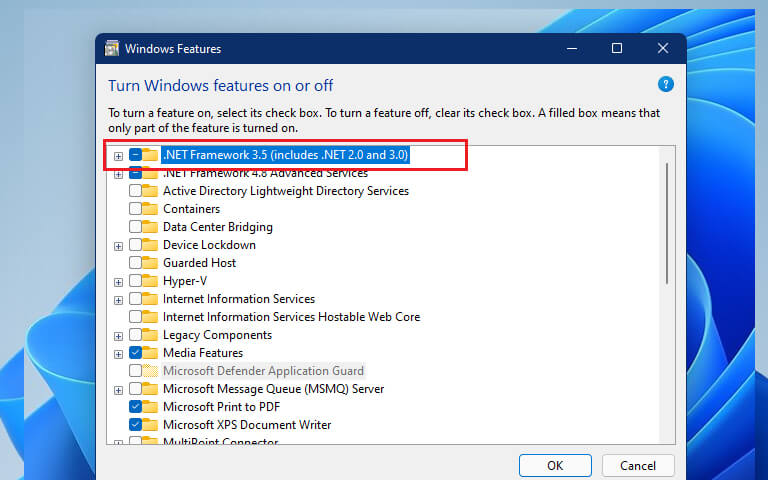
Navigate and find “.NET Framework 3.5” and enable it by checking the box beside it. You might also find Net Framework 2.0 or 3.0 too, select them and click on OK.
Soon a prompt will appear, select the Let Windows Update download the files for your option. A single reboot is required. Restart your system and your NET Framework is enabled.
Note: you might also find features as Windows Communication Foundation (WCF) HTTP Activation and Windows Communication Foundation (WCF) Non-HTTP Activation by expanding the NET Framework feature. However; the features are only recommended for developers or administrators that need the feature.
Related Topic: Fix Error 0x800f0950 .Net Framework 3.5
Use CMD to Enable NET Framework
Start the procedure by running the CMD as administrator. Then you will use the command below:
Dism /online /Enable-Feature /FeatureName:"NetFx3"Once the command given above completes the operation, you will find the details given below on your screen:
Deployment Image Servicing and Management tool
Version: 10.0.22000.1
Image Version: 10.0.22000.71
Enabling feature(s)
[==========================100.0%==========================]
The operation completed successfully.
Enable NET Framework with PowerShell
If you are not familiar with CMD then you can also use PowerShell. The same method is also applied to PowerShell. You start the procedure by running the PowerShell as administrator, then will use the command below:
Enable-WindowsOptionalFeature -Online -FeatureName "NetFx3"Compatibility Errors on Windows 11 with NET Framework
While using NET Framework, you might encounter different errors as Error 0x800f0950 .Net Framework 3.5. there will be compatibility error, there will be error due to missing files or corrupt files. In simple words, you will experience errors for sure. To fix all of the problems, you can use a third-party application as a Repair tool to fix them all within a single click. If you got any problems during or after the installation, please comment down.

