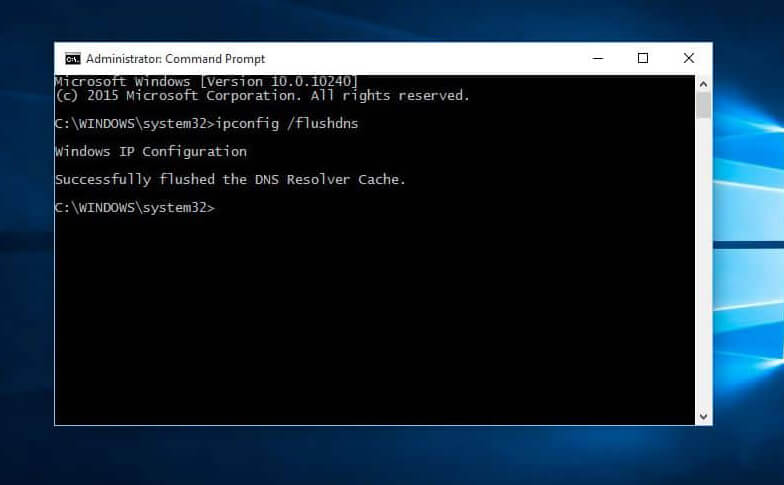
How to Clear DNS Cache Windows 10 (Server and Workstation)?
If you are experiencing DNS problems on your Windows 10, then this can help you. Normally, when you visit any website, the IP address of that web server gets stored on your DNS. All the web pages have an IP address that is saved on your DNS, even on this page your system is saving the DNS of our site.
There will be times when the browser takes the data and puts it in the wrong entry or the local cache got mixed up. Such situations can cause DNS problems, and here we can clear(flush) DNS cache on Windows 10 (both server and workstation) using CMD, Windows Server DNS console, and PowerShell.
Related Topic: How to Flush DNS Cache on Windows 11?
Table of Contents
Clear DNS Cache on Windows 10

Here is how to clear the DNS cache on Windows 10 using CMD (command prompt).
Step 1- Run CMD

First, you will need to open CMD (command prompt) on your system. You can open CMD by clicking on Start, type CMD, and right-click on it. Run the CMD as Administrator.
Note: you will need to run CMD as admin due to security issues. Running CMD without admin authority won’t affect your system.
Step 2- Flush local cache
Now in the CMD, use the following command:
Ipconfig/flushdnsThis command will help you to flush the local cache of your system.
Step 3- check local cache (optional)
This step is quite optional. For users who want to check their local cache, they can use the command below in CMD.
Ipconfig/displaydnsAfter using the command in CMD, you will find something like this on your screen:
[fl_builder_insert_layout slug=”ad_sw_ip_address_tracker_incontent”]Flush DNS Windows Server
Most of the time, it is not the local client issues that users are experiencing (mostly on Windows Server). There are also moments, where the issue is caused due to bad cache entries too. For such moments, here is how to deal with them.
You will need to open DNS Console. Right-click on DNS Server, there you will find the Clear Cache option. Click on Clear Cache, and you have flushed your DNS on Windows Server.
Flushing DNS with PowerShell on Windows 10
Here are some commands that can be used to deal with DNS on your system in PowerShell.
To clear Client use: Clear-DnsClientCache
To clear DNS Server: Clear-DNsServerCache
If you want to specify your DNS: Clear-DnsServerCache –ComputerName “DC1” –Force
Remember one thing, that here you will need to replace “ComputerName” in the command and use your computer’s name.
Cleaning DNS on other Windows OS
If you want to perform the same procedure on other Windows OS that includes Windows 2003, Windows XP, Windows Vista, Windows 7, Windows 8, Windows 8.1, Windows Server 2003, Windows Server 2008, and Windows Server 2016.
Go to Start and run CMD as administrator.
Now, inside the CMD type this command:
Ipconfig/flushdnsThe command above will clear DNS from your system and your DNS will start working again.

